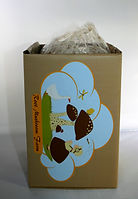
Root Mushroom Farm
Oyster Mushroom Growing Instructions
It is very easy to grow mushrooms with this kit. No need to soak, it comes alive without soaking! The only thing you need to do is spray. You may place the kit on a coffee table, counter, or desk - it will produce mushrooms virtually anywhere with light and room temperature (55°F~80°F) at your home or office! Now you have the opportunity not only to enjoy watching these exotic mushrooms growing but also to enjoy eating the freshest mushrooms possible.
Step1.
Step2.
Step3.
Growing conditions
-
Temperature: 55°F~80°F. While the mushrooms are in the initial stage of growth, please DO NOT keep your kit in a constant-temperature environment. The log need about a 10-degree temperature fluctuation daily, with a few hours of temperature lower than 70 degrees EVERYDAY until you see mushrooms. After that, a constant temperature can be tolerated. Keep in mind that cooler is always better than warmer.
-
If your place does not meet temperature requirements, please consider to set up your kit outside during night and bring it home in the morning until you see mushrooms.
-
Light: Oyster mushrooms need light to grow, but do not expose your kit to direct sunlight. A normal level of indoor light is sufficient.
-
Water: The log already contains enough water, so do not water it. As long as there are condensation droplets on the inside surface of the humidity tent, you do not need to spray. If there are no condensation droplets, please spray. However, AVOID OVERWATERING the surface of the log. If there is any water visibly pooling on the log, please remove it. In~7days, you should be able to see mushrooms growing. Once mushrooms start to grow, please do not spray the surface of the log or the baby mushrooms. (Otherwise, they will become withered.) Simply keep the humidity tent moist with condensation droplets.
-
When your mushrooms are growing and the humidity tent is blocking their the way, you may just remove the tent, and spray the mushrooms directly.
Get Ready For Your Next Batch of Mushrooms
This kit can give your multiple flushes (rounds of fruiting) before it is exhausted. Some of our clients have even had four flushes.
Each time, after you pick up all mushrooms:
1. Use a fork to scrap away the top layer of the log to remove any leftover mushrooms and stems.
2. Soak the whole log with the plastic wrapping still intact in water overnight (use a weight to keep the open end of the log under water).
3. Remove the log from underwater and drain any excess water, then use any plastic bag you have (like from a grocery store) to wrap the log completely. Place the log back into the box, close the box, and leave the log inside. Place the box in a dark place for 7 days.
4. After 7 days, open the box, remove the plastic bag you placed around the log (not the original plastic wrapping, which should always be kept with the log). Spray the open surface of the log and the inside of the humidity tent as before. Please note that you might see some white fuzzy stuff growing on the surface of the log, this is mushroom mycelium, not mold. Do not try to clean it off or discard the log.
5. Enjoy another growing flush!
Cut the plastic bag that surrounds the log just below the plastic tie; and always keep the rest of plastic wrapped around the log to maintain proper humidity.
Place the log back into the original product box with all flaps tucked inside the box. Cover the box loosely with the humidity tent, being sure to pull the tent, open side down, over the box top as indicated in the right diagram.
When majority of your mushrooms reach maturity
(the mushroom cap edges are about to flat out),
pull off all mushrooms no matter large or small.
Any mushrooms or stems left on the log will get slimy as they decompose and will sicken your log if not removed.

Be sure to mist both the exposed end of the log and the inside of the humidity tent until you see mushrooms, using the spray bottle supplied. Normally twice a day should be enough. for more detials please check"water" in following "Growing Conditions".
Once you cut your mushroom bag open and set your kit in an ideal location, try not to move, shift, or jiggle the kit. Doing so may delay the fruiting of your mushrooms.
Harvest


.png)